| Viewing 3D Photographs |
|
Warning!
Viewing stereoscopic image pairs can be dangerous. If you think your eyes are about to hurt, stop immediately. If you think your head is about to hurt, stop immediately. If you look up and it takes more than a split second to bring the real world into focus, stop immediately. If you suffer from migraines or epilepsy, don't even start.I've been looking at 3D image pairs since my late teens. I'm very experienced at it. I'm also one of the lucky 0.5% of the population who doesn't get headaches ever ever ever under any circumstances (it's hereditary). At the time of writing, I don't need glasses (but give me another 5 years...). Nevertheless, I am always very careful when viewing 3D images. As with any machinery, making your visual system perform at its limit isn't something you ought to do with impunity.
Some safety rules:
- Never look at a 3D image for more than a few seconds.
- Make sure lighting conditions are good.
- Ensure there are no reflections on the image surfaces (ie. the monitor screen or developed photographs).
- Line up your head so that the image surface is sqaure on to your face, not at an angle.
- Don't do it while you're tired.
- If your eyes or brain start to suffer fatigue, stop for at least 5 whole minutes before even considering trying again.
The Theory
There are essentially five ways by which the human visual system can build a 3D model of a scene inside your head:
- Pictorially. The man occludes a section of wall, therefore the wall must be behind him.
- Stereoscopically. My left eye sees part of a bush adjacent to the car and my right eye doesn't. The bush must therefore be behind the car.
- Motion parallax. When I look at the tree and move my head left, the woman seems to move to the right; when I look at the woman and move my head left, the tree seems to move to the left; therefore, the woman must be closer than the tree.
- Convergence. I have to cross my eyes more to look at the cup than I do to look at the book, therefore the cup must be closer than the book.
- Focus. I have to focus harder to see the fork than I do the spoon, therefore the fork is closer than the spoon.
2D photographs only give you number 1 of these. 3D stereoscopic pairs give you numbers 1 and 2. TV and movies give you numbers 1 and 3, although the 3 is only when the camera tracks (ie. smoothly changes position), not when it pans (rotates) or when the subject moves but the camera doesn't. Holograms and reality will give you all 5 types of visual cue.
By far the single most important cue for 3D imagery is the second: stereoscopic viewing. People with one eye can get by with the others, but people with two (working) eyes only have to close one of them to experience the staggering loss of depth perception that people with monoscopic vision have to endure the whole time.
The technique I use here for 3D images assumes on stereoscopic vision. It therefore follows that if you don't have stereoscopic vision (eg. you have a lazy eye) then you can forget any idea of seeing 3D pictures this way. I'm sorry, but you just don't have the necessary hardware.
OK, so this is how it works. Two photographs are taken of the same subject from slightly different places. One of these is presented to the left eye and one is presented to the right eye. The visual cortex chunters away doing the massive amounts of parallel computation necessary to resolve the two images into one until hey presto, a 3D image!
Of course, it's not quite that easy...
The first stumbling block is presenting separate images to each eye, and the second is bringing them into focus. By far and away the best artificial method for doing both of these is to use a viewer. We're not going to be using a viewer, but I'll explain the idea anyway because it makes the process we shall be using clearer.
The simplest viewer consists of a couple of lenses attached by a rod to a stand a fixed distance away (20-40cm, depending on the strength of the lenses). You place the images on the stand, gaze through the lenses at them, and the images are presented to your eyes focused as if you were looking at them in real life. As far as your eyes and brain are concerned it's as effortless as viewing reality, and you can stare at such pictures for ages with no ill effects.
The Victorians went a bundle on this kind of thing, and you can still buy stereopticons from antique shops at reasonable prices. Later generations have improved on the basic model: when I was a child, I used to enjoy looking through the Weetabix 3D Viewer my grandad saved from cereal packets in the 1950s. The 3D Viewmaster toy, with its circular reels, is a perennial favourite (albeit one you can't take photos for yourself). Anaglyphic stereo pictures (using red/green or red/blue glasses) still make regular appearances as novelty inserts in magazines, even though the images you get from them are monchrome. Nowadays, a variety of high-tech viewers are available (oppositely-polarised or alternately-flashing lenses being very effective) but you need to buy the appropriate equipment.
Hard to show on a regular computer screen, then.
The technique utilised to view the 3D images that I show here requires no special kit. It's fairly easy to learn and (I think!) quite fun. Two images are presented, side-by-side. The one on the left is for your right eye, and the one on the right is for your left. You cross your eyes until you get a single (out-of-focus) composite image, then you bring the image into focus without uncrossing you eyes - effectively decoupling the combined focus/convergence system your eyes normally employ.
The alternative to crossing your eyes is the "parallel" approach popularised in random-dot autostereograms. With this, you look through the image into the far distance, then, keeping your eyes parallel, you bring the image into focus. I don't like this much, because the images have to be pretty small or your eyes end up diverging in order to encompass them. If you prefer it this way round, though, you need to swap the left-and-right images so the left eye gets the left image and the right eye gets the right one. Buy a cheap pair of super-strong reading glasses, too, that could seriously help (I got some off-the-shelf +4 magnification ones that were great until my kids nicked them).
Anyway, to summarise, the technique I shall be outlining here involves crossing your eyes and refocusing. It doesn't need a viewer, just patience.
Viewing Stereoscopic Image Pairs
It's now time to describe the physical process of viewing the images as I present them here. Viewing real photos (rather than on-screen image) is similar, but you'll have to set them up yourself; the digitised images I'm using have already been set up and aligned for you, which makes it all a little easier.First, a word about how the pictures appear when you get to see them in 3D, so you know what you'll be looking for. They do not jump out of the screen at you; it's more like you're looking into a box with an opening starting at the screen and carrying on beyond the screen into the monitor. The box seems to contain the image. Also, the 3D image will appear slightly smaller than the 2D images that make it up.
The images come in pairs. They'd look a lot nicer at a higher resolution than I'm using, but I have to keep them small (360 by 230 pixels) in order to be able to get them to fit on screens that may be only 800 pixels wide. Real photos look a lot better than low-resolution JPEGs.
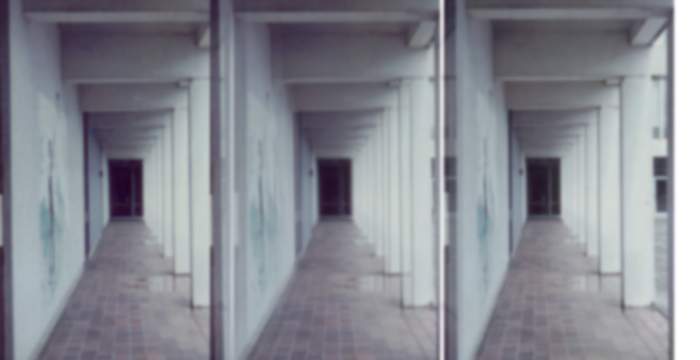
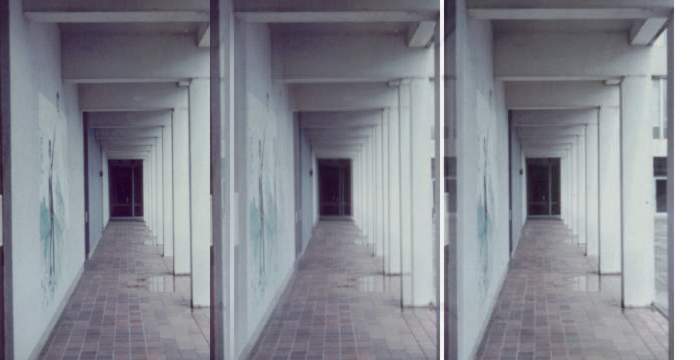
This is the training image I shall be using. It's a picture of the cloister of Square 2, Essex University, as it was in about 1980.
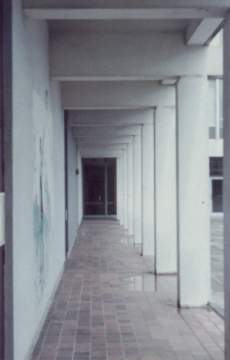
I chose this out of all my 3D photographs because the dark rectangle at the end of the corridor is a very powerful visual cue. If you can cross your eyes to make the rectangles from two images coincide into one, you can "lock" it in place while you bring the image into focus.
Ah, yes, you need two images for this to work. Open the following link
in a separate window, so you can continue to read my instructions here
while having something around to practise on:
![]() Essex University.
Square 2 cloisters, circa 1980.
Essex University.
Square 2 cloisters, circa 1980.
Image size: 2 x approx. 8K.
(To open in a separate window, Internet Explorer and Netscape users should
right-click on it and select "Open Link in New Window". That's
if you're using a PC - gawd knows what you should do on other hardware...).
OK, now to view the picture that shows in the window you just opened, you should position yourself at least 50cm from the screen, preferably more like 100cm away. As you become more experienced the distance won't be so important, but for first-timers it's easier if you keep back.
Line yourself up so that the black rectangle in the centre of the image is at eye level and centred for your face. You don't have to worry about being completely accurate here, because your visual system is pretty robust and gives you quite a lot of leeway. Aim to have the pictures square on to your face, but don't bother getting out the spirit level and meter rule...
OK, now you're going to cross your eyes so that the images combine. The following illustrations give some impression of what it kinda looks like:
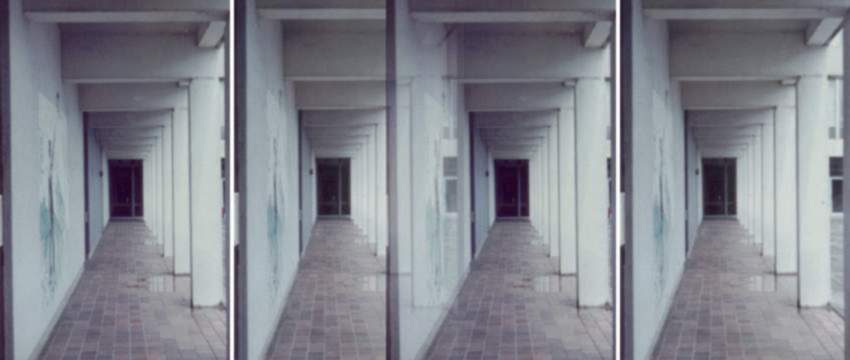
First of all, though, you see that central, dark rectangle? Try to reconcile the image on that, rather than the borders of the photos. It may be you already did use that as your overlap area, in which case try to make the borders line up instead.
If you're lucky, suddenly everything will slip into focus. However, you probably won't be lucky. Give your eyes a rest by looking at things in the real world for a bit instead.
When you feel ready, come back to the image, and cross your eyes until the dark rectangles line up. Now try to hold this position while bringing the rectangle into focus. If you start to lose the reconciled image, forget about focusing and bring it back into line, then try refocus again. After a few attempts, you'll find that you can lock your eyes so that they don't uncross while you tinker with the focusing.
Give your eyes a rest again. I can't stress too highly how you should do this regularly and often. It's better that you take ages to get it right than you do it all on one go then can't see straight for the rest of the day.
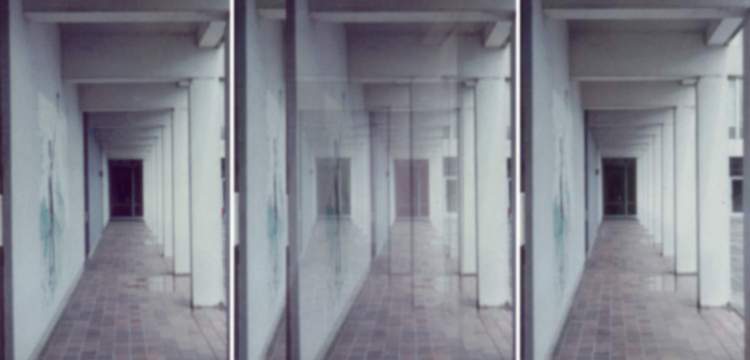
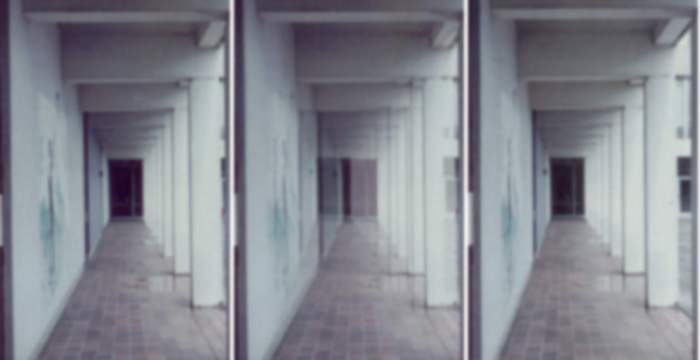
Eventually, you'll be able to bring the central rectangle into focus. Quite often, this is a sudden slide that takes you completely by surprise. One moment you're struggling to focus your eyes without moving them, then the next it's as if someone has grabbed your eyeballs and held them exactly in the right place. It can be both an exciting and disarming experience, but the result is wondrous! It'll look something like this, but with one major difference and one minor one:
The minor difference is that the two side images will sort of flicker in and out, as only one eye can see them. The major difference is that the central image will be in 3D!
OK, rest your eyes again, then repeat the experiment. It becomes a lot easier on subsequent attempts. You should find that once you have 3D you can move your attention around within the apparent "box" and still retain the image - your relieved brain will lock on it so that breaking the generated scene it takes an act of will (not a great one, but you do nevertheless have to decide to stop looking, rather than its happening whether you like it or not).
This particular image has an especially pleasing feature that many stereoscopic photo newbies like: its puddles. Once you can see it in 3D, look at the puddles and you'll notice that the pillars are reflected in them in just the way you'd expect in real life. They become far more significant to the picture than they are in 2D, when most people would barely notice them.
The images I present are all set up to be the same size (if not the same orientation) as the training example I've used here. You should be able to use the same technique to view them all. If you want to take 3D pictures yourself, take a look at my tutorial on the subject - it isn't hard, but you may as well see if there are any tips there that might help you not make the same mistakes I did when I started out.
Finally, I'm not the only person to take 3D pictures. There are other people who have been doing it for far longer and who have much better photos. They even have special viewing software to render the images in whatever format you like best. If you find you like this kind of thing, I suggest you use http://www.3dphoto.net as your starting point for further exploration.
Viewing Your Own 3D Photographs
If you take your own (non-digital) 3D photographs, viewing them isn't a great deal different to viewing the ones I have here. The main difference is that they're not lined up for you, so you have to do it yourself. Rarely do the edges of the photographs match, so you have to use physical features within the photographs (like the dark rectangle in the training example) to orient yourself. Fixing virtical misalignment by moving the photos around is the most difficult challenge you're likely to encounter; in other words, there's not a lot to worry about...The main remaining problem you are likely to face is very simple: deciding which is the left image and which is the right. If it's not written on the back, you have a 50/50 chance of getting it right at random. How do you know it's wrong? It just looks wrong... Swap the images round and it'll look right.
The only other difficulty you might have concerns rotational misalignment. The human visual system is actually pretty good at this, being able to reconcile images that are rotated up to 15 degrees out of true. It's better for your brain if there's no rotation at all, though, so if you do find yourself straining then rotating one of the photos a little in the right direction may help.
For large photos, you'll need good lighting (with no reflection on the photos themselves) and you ought to position yourself some distance away. I usually go for arm's length, so I can move the photos to get the best image while not stressing my eyes. Larger images mean you have to cross your eyes more to reconcile them, but the further you are away then the less pronounced the crossing has to be. Of course, the 3D image will be further away, too, which isn't always what you want, but if in doubt you should err on the side of your sight, not on the side of your aesthetic values.
Oh, something I ought to mention. You know those "spot the
difference" puzzles you get in some newspapers and magazines? They
are an absolute doddle if you look at them like they were 3D image pairs.
The differences scream for attention, because one eye sees them and the
other doesn't. Have a go at this one; the differences are tiny, but
you'll scarcely believe how easy it is to find them!
![]() Ranma 1/2.
Copyright © Rumiko Takahashi.
Ranma 1/2.
Copyright © Rumiko Takahashi.
Image size: 2 x approx. 15K.
Hint: there are 8 differences between the two images.
Testing, Testing...
Many people say they can see 3D images but they can't. After all, you only have to stare at the pictures for 10 seconds, smile knowingly, and who can tell whether you're really seeing them in 3D or you're just making it up?Well, there are ways and means...
One way you can test someone is to show an image pair using the same photo for the left and right components. If they say they can see it in 3D, they're fibbing! Another method is to swap the left and right images. If they don't notice there's something awry, they aren't viewing it in 3D (unless they're using the "parallel" technique, in which case heaven help them...).
Here are three other tests you can give people. They also have the advantage that you can take them yourself, to confirm (or otherwise!) to yourself that you really are seeing the images as they're supposed to be seen.
- Which branch of the tree on the right is the closest?
 Wivenhoe Park.
Essex University campus.
Wivenhoe Park.
Essex University campus.
Image size: 2 x approx. 12K.
The chances are, people who are only viewing in 2D won't even see the branch, let alone know that it's closer than the others. - How many people moved between the two shots that make up this 3D picture?
 Leaning Tower of Pisa.
Italy.
Leaning Tower of Pisa.
Italy.
Image size: 2 x approx. 12K.
Everyone can see the two people on the third tier, although only to 3D viewers is it immediately apparent that the person in red walked round to the left edge of the tower. Most 2D viewers will spot the woman in pink on the fourth tier, but would have a hard time of confirming that part of her is still visible at the right edge of the tower as she continues round. The person on the first tier can slip by if you're not paying attention, making four people who moved in total. There are another two people, but they probably didn't move: one is on the first tier at the left edge, sitting down; the other is on the second tier, also at the left edge, where you can just make out a head on the right-hand image. Both of these individuals are occluded by pillars in the first image, but a 2D viewer (observant enough to spot them) wouldn't easily be able to tell whether they had moved into the picture or were there already. A 3D viewer can see that they were probably stationary, although a pedant could argue that they may have moved into position very quickly. - Finally, is the ironwork in this next photo pair coming towards the observer,
going away from the observer, or is it basically flat?
 Orchard Road. Roof of
a shopping centre, Singapore.
Orchard Road. Roof of
a shopping centre, Singapore.
Image size: 2 x approx. 21K.
You really shouldn't need to ask the answer to this one as it's glaringly obvious if you can see it in 3D!
Copyright ©
21st August :\webdes~1\ view3d.htm